• Sign Up! To view all forums and unlock additional cool features

    Welcome to the #1 Focus RS Forum and Focus RS community dedicated to Focus RS owners and enthusiasts. Register for an account, it's free and it's easy, so don't hesitate to join the Focus RS Forum today!


2016+ Fiesta ST Evap Purge P144C check engine light "FIX"

Trader history for ron@whoosh (1)

Messages
231
Likes
135
Location
Corsicana
#41
Unless you can speak to a Ford engineer that worked on the FiST program, I doubt we'll ever 100% know for sure. All we have are theories. CP-E just released an adapter that doesn't block it off, so that's an untested option for anyone that's interested. Hopefully they have better luck than MAP or Mishi.

I'm not advocating for or against this method. I can only speak for myself, but I've put over 20k miles with it blocked off with zero issues.

It basically boils down to a simple question: Do you have a 2016+ and want to run an aftermarket intake without throwing a CEL? Currently, blocking it off is the only proven method that doesn't throw a CEL, so this is your only recourse unless CP-E's adapter pans out or MAP/Mishi fix their designs.

Your other option is to just stay stock. The stock intake is very well designed, and a good drop in panel filter and maybe a VT Bigmouth will pretty much net you the same amount of HP as most any aftermarket intake, with maybe the exception of the 2j. Aftermarket intakes on this car are basically engine bling that makes whooshy noises. Even my MAP intake still utilizes the stock plastic crossover tube. So why didn't I just stay stock? Because I wanted engine bling and whooshy noises, and the money was available.


Sent from my iPhone using Tapatalk


A7xogg

Active member
Messages
580
Likes
144
Location
Hampton roads
#42


Hey all, update here. Got my whoosh adapter in the mail pretty quick and installed even quicker. Due to the location of the connection port on my MAP intake I decided to wrap the whoosh adapter around the (Hot!) radiator hose to prevent kinking. I really don't expect any issues but if something happens then I will most likely end up trimming the tubing to fit exactly. Just didn't feel like hacking away at my new adapter piece right away :) Anyway I installed it and let the car run for a bit, then plugged in my OBD2 reader and bingo, 0 codes to speak of! Happy so far... attached a pic of how I ghetto routed the hose.

Anyway thanks for the help and feedback to those in the thread and especially to Whoosh.
how secure is that connection that connects to the intake feed for the evap?


A7xogg

Active member
Messages
580
Likes
144
Location
Hampton roads
#44


Hey all, update here. Got my whoosh adapter in the mail pretty quick and installed even quicker. Due to the location of the connection port on my MAP intake I decided to wrap the whoosh adapter around the (Hot!) radiator hose to prevent kinking. I really don't expect any issues but if something happens then I will most likely end up trimming the tubing to fit exactly. Just didn't feel like hacking away at my new adapter piece right away :) Anyway I installed it and let the car run for a bit, then plugged in my OBD2 reader and bingo, 0 codes to speak of! Happy so far... attached a pic of how I ghetto routed the hose.

Anyway thanks for the help and feedback to those in the thread and especially to Whoosh.
How hard was it to take the stock line off the t-fitting where the whoosh line connects to?


OP
ron@whoosh

ron@whoosh

3000 Post Club
Vendor
Premium Account
Messages
3,971
Likes
4,065
Location
Las Vegas
Thread Starter #46
How hard was it to take the stock line off the t-fitting where the whoosh line connects to?
I had to cut mine off.
all you have to do is cut a small slit vertically on the "T"
then slide the plastic line off the "T"

when you want to revert back to stock
make a clean cut on the plastic line (where you originally made the small slit) then heat and slide back on

plenty of line left to accomplish this


OP
ron@whoosh

ron@whoosh

3000 Post Club
Vendor
Premium Account
Messages
3,971
Likes
4,065
Location
Las Vegas
Thread Starter #47
How hard was it to take the stock line off the t-fitting where the whoosh line connects to?
I had to cut mine off.
all you have to do is cut a small slit vertically on the "T"
then slide the plastic line off the "T"

when you want to revert back to stock
make a clean cut on the plastic line (where you originally made the small slit) then heat and slide back on

plenty of line left to accomplish this


Messages
20
Likes
4
Location
Baltimore
#48
Just checking in to see if anyone was throwing a P144C code AFTER installing the "Fix Kit"
All fittings seem tight. I cut the hose down to shorten in so that there is no possibility of kinking. Its a straight shot from "T" fitting to Intake. With the "UPR" reading left to right..facing the intake (just to make sure I installed it correctly after cutting all the hose.

Not sure what the problem could be. But I'm not fond of staring at the CEL on my dash forever.
Any thoughts anyone?


Flaco

2000 Post Club
Messages
2,338
Likes
1,863
Location
Ellijay, GA, USA
#49
Just checking in to see if anyone was throwing a P144C code AFTER installing the "Fix Kit"
All fittings seem tight. I cut the hose down to shorten in so that there is no possibility of kinking. Its a straight shot from "T" fitting to Intake. With the "UPR" reading left to right..facing the intake (just to make sure I installed it correctly after cutting all the hose.

Not sure what the problem could be. But I'm not fond of staring at the CEL on my dash forever.
Any thoughts anyone?
I've had the "fix kit" on for about 3 months and 4 thousand miles and have thrown the code 2 more times. I have checked and rechecked everything. I just clear the code and forget it.


OP
ron@whoosh

ron@whoosh

3000 Post Club
Vendor
Premium Account
Messages
3,971
Likes
4,065
Location
Las Vegas
Thread Starter #50
I've had the "fix kit" on for about 3 months and 4 thousand miles and have thrown the code 2 more times. I have checked and rechecked everything. I just clear the code and forget it.
Please make sure the 90 degree quick connector is fully seated that is "clicks" on the Mishimoto induction hose you have listed in your mods signature
Iv'e had a few customers that needed to trim back some silicone to allow enough roon for the connector to seat

If all connections are seated and sealed the only other possibilities are that the check valve in my kit is potentially a faulty valve which I will gladly send you a new one (send me a PM with address) or the last possibility is the evap purge solenoid could be faulty. cp-e 's test car was brand new and had issues with their factory evap parts.


Flaco

2000 Post Club
Messages
2,338
Likes
1,863
Location
Ellijay, GA, USA
#51
Ron several weeks ago I replaced your kit connector with the Ford connector to the induction hose. It is possible that I damaged the connector you supplied with your kit. I haven't had a code in about 800 or 1000 miles. I don't think there's a problem with the valve or purge solenoid. [:)]


Attachments

OP
ron@whoosh

ron@whoosh

3000 Post Club
Vendor
Premium Account
Messages
3,971
Likes
4,065
Location
Las Vegas
Thread Starter #52
Ron several weeks ago I replaced your kit connector with the Ford connector to the induction hose. It is possible that I damaged the connector you supplied with your kit. I haven't had a code in about 800 or 1000 miles. I don't think there's a problem with the valve or purge solenoid. [:)]
thanks for the feedback man!!!!


OP
ron@whoosh

ron@whoosh

3000 Post Club
Vendor
Premium Account
Messages
3,971
Likes
4,065
Location
Las Vegas
Thread Starter #53
back orders shipping today - very sorry for the delays gents!!!


Messages
8
Likes
2
Location
Twin Cities
#54
just an update for my situation, i did actually get the P144C to pop up ONLY ONCE in the last 1500-2000 miles while using my 'modded' fix kit from whoosh (trimmed tubing to fit my MAP intake a little more nicely). On that day it was pretty cold up here in MN so I just attributed it to that. Since I run an accessport now its super easy to just clear the code and memory. I figure that 95% of the time this fix is doing what its supposed to and suppressing that annoying code, which is good enough for me!

Sincerely a satisfied customer,
JS


Messages
289
Likes
123
Location
Calgary
#55
just an update for my situation, i did actually get the P144C to pop up ONLY ONCE in the last 1500-2000 miles while using my 'modded' fix kit from whoosh (trimmed tubing to fit my MAP intake a little more nicely). On that day it was pretty cold up here in MN so I just attributed it to that. Since I run an accessport now its super easy to just clear the code and memory. I figure that 95% of the time this fix is doing what its supposed to and suppressing that annoying code, which is good enough for me!

Sincerely a satisfied customer,
JS
I'm in the same boat. Roughly 1000 miles after I installed the fix I finally had a chance to take the car out and really hoon around in it, which threw the p144c code. I cleared it and never saw it again, good enough for me.


OP
ron@whoosh

ron@whoosh

3000 Post Club
Vendor
Premium Account
Messages
3,971
Likes
4,065
Location
Las Vegas
Thread Starter #58
I'm getting the code now. Don't recall the mileage since it's been on. Clear and see if it pops up again?
shoot a pic of the install
what intake
make sure the hose has no kinks and all the connections are secure
clear the code and reset KAM
let me know the mileage or time interval if and when the code pops up. Worst case you may need a new check valve which I'l send you if needed...

I've logged near 10k now miles on my personal Fiesta with no light, ever.


Messages
68
Likes
64
Location
Mount Royal, NJ
#59
shoot a pic of the install
what intake
make sure the hose has no kinks and all the connections are secure
clear the code and reset KAM
let me know the mileage or time interval if and when the code pops up. Worst case you may need a new check valve which I'l send you if needed...

I've logged near 10k now miles on my personal Fiesta with no light, ever.
CP-E intake

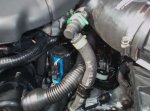
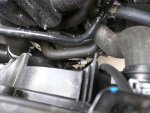
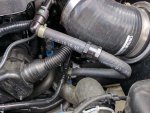
IMG_20170618_150817.jpg IMG_20170618_150806.jpg

Sorry what's KAM?


Messages
72
Likes
28
Location
San Diego
#60
Sounding like a dweeb here, but some of this threads earlier photos are "blocked" by Photobucket site. So there are fewer photos to view when preparing to do this install. I realize it must be straightforward because the word "easy" was used several times. Still, a picture is worth a thousand words and Id like to be 1000% sure that I do it right the first time. My biggest question is where does the separate capped plug connector go? The few photos that are still visible in past posts dont seem to ever show it, or I'm just missing it.

Simply asking for clear instructions/photos for which parts to remove from the Mishi crapola and where the 2 pieces provided by Ron go. thank you :)


Top